INTERIOR DECORATING - INTERESTING IDEAS

Милые вещицы и идеи для дома.

COUNTRY CROW E-PATTERN SHOP ON ETSY IS RUNNING!

Магазин PDF-Выкроек для всех кто любит шить!

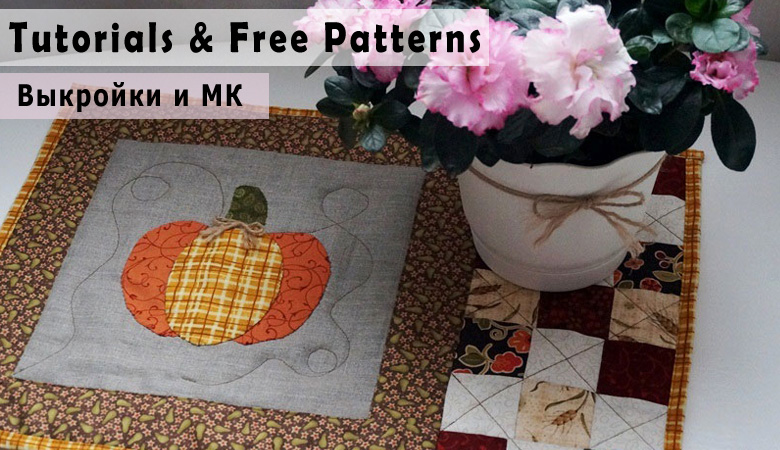
FREE SEWING PATTERNS, TUTORIALS AND INTERNET FINDINGS

Делюсь своими выкройками, мастер-классами и интернет находками.

PHOTOGRAPHY - A LITTLE ABOUT EVERYTHING

Фото Воскресенье - по-немногу обо всём!

Showing posts with label tutorials МК. Show all posts

Aug 1, 2015

Handmade Dog Bowl Stand ❤ Подставка для мисок МК


Всем прекрасных выходных! Сегодня я хочу показать небольшую рукодельную подставку для собачьих мисок, которую я сделала для нашего той-терьера Таюши. Теперь ему гораздо удобнее кушать, а подставка с новыми чашками отлично вписалась в интерьер нашей гостиной! :) Ниже весь процесс изготовления.
Hi! I hope you're having a nice weekend. Today I would like to show you a small wooden dog bowl stand that I made for our Russian toy terrier Tyler. Now it's more comfortable for him to eat. This bowl stand made a great addition to our living-room. See some pictures of the making process below.

Jul 20, 2015

Cute Placemats Tutorial ❤ Салфетки ланчматы МК


Здравствуйте, мои любимые гости и читатели! Надеюсь все хорошо отдохнули в выходные! 
Сегодня я с небольшим мастер-классом о том, как сшить вот такие милые клубничные ланчматы. Они украсят любой стол и придадут вашей кухне летнее настроение!
Hello my dear readers and guests! I hope you all had a great weekend! 
Today I've prepared a small tutorial for you. These cute strawberry placemats are very easy and fast! They would make a great summer decoration for your kitchen!

Jun 17, 2015

Stenciled Wood Planter DIY ❤ Ящик для цветов МК


Доброе утро/ вечер! Сегодня я приготовила небольшой мастер класс о том, как я делаю надписи на дереве, на примере деревянного ящика для цветов.

Уже недели две я тружусь над украшением нашего балкона. Следующим летом мы собираемся его утеплить и полностью переделать. А пока - это простой летний балкон (точнее лоджия), где я держу свои цветы и другие растения. На это лето мне хотелось сделать из него такой мини-садик с множеством зелени и местом для чаепитий, чтения и вязания.

И вот, неделю назад ко мне пришла сумасшедшая идея - сделать деревянный стол для цветов из досок. Идею поддержал мой муж :) Мы купили доски, шурупы и краску и сделали стол! Посмотреть на него можно в конце этого поста :)

От стола у меня осталось много деревянных досочек (чему я была несказанно рада!), и я решила сделать ящик для своих цветов. Ящик делается очень просто. Всего нужно 3 одинаковые досочки для длинных сторон и дна, плюс две маленькие боковушки. Скрепляем всё тонкими шурупами. Потом красим ящик акриловой краской. Я развела чёрную краску водой, так чтобы она давала только серый оттенок, и покрасила ящик. Нужно дать краске высохнуть перед нанесением букв.
Good morning/ evening! Today I have prepared a small tutorial for you. I'd like to show you how I make and use stencils.

For the last couple weeks I've been working on our balcony. Next summer we're going to totally remodel it and make it warm for winter. But for now it's just a summer balcony where I keep my plants. I really want to make it a nice and cozy place with lots of plants where I could sit down and have some tea or read or crochet. 

So, a week ago I got this crazy idea to build a console table for my plants. And we did it! We bought some wood, paint and screws and built the table! You can see some pictures at the end of this post.

I had some leftover wood (And that made me really happy!), so I decided to make a wooden planter box. It has 4 side boards and one bottom board. They all were connected with thin screws. Then I painted the box with very diluted black acrylic paint. (You can use wood stain if you like.) Let the paint dry before you use stencil.

Jun 16, 2015

Summer Baby Dress + DIY Link ❤ Летнее платье для малышки + МК ссылка


Привет! Сегодня хочу похвастаться, какие у меня получились милые платья для малышки, а также поделиться ссылочками на выкройки и МК для этих платьев.
Пошились у меня два платьица для ребёнка 3-6 месяцев. Это я всё приданое для своей ляли готовлю. Выкройки с мастер классами нашла в интернете в англоязычных блогах. 

Итак, первое - красно-розовое платье.
МК и выкройку смотрите здесь: тык
Hi! Today I'm going to show you two super cute baby dresses that I made. Both dresses are made of cotton fabric and would fit a 3-6 month old baby girl. I made them for my daughter who will soon be born.

The first dress is pink and red. 
A free pattern and tutorial that I used I found at 'Shwin and Shwin' website here: click

Jun 7, 2015

Soft Baby Rattle Tutorial ❤ Мягкая погремушка МК


Всем привет! Сегодня мы будем шить мягкую игрушку погремушку для малыша! Я нарисовала выкройку и подготовила простой мастер класс. 

Такие игрушки довольно дорогие, поэтому сделав её своими руками, можно сэкономить! Кстати, это собачка ))) При желании можно сделать мишку, кошку, зайку, обезьянку и ещё кого угодно, просто изменив форму ушей! Игрушка очень хорошо гремит, звенит и шуршит! 

Итак, приступим!
Hi everyone! Today I have prepared an easy and fun tutorial for you! We are going to make a cute and soft baby rattle. I made a blue dog, but you can make a bear, a cat, a rabbit, a monkey or any other animal! You just need to change the ear shape a little.

Such toys are pricey, so if you make one you can save some money! :)
The toy is soft and noisy, and I'm sure your baby will love it!

So, let's start! 

Jun 5, 2015

Diaper Bag + DIY Link ❤ Сумка для мамы + МК ссылка


Всем привет! :) Я сегодня с новой сумочкой для мамочки! Готовлюсь к появлению своей малышки. Пошилась у меня вот такая вот сумка для подгузников и детских вещей. Её можно вешать/ставить на коляску во время прогулок. Крепление к коляске можно додумать. Моя коляска ещё в пути, поэтому решила, что пока сумка будет без креплений, с обычными ручками.

Мастер класс я нашла вот тут: тык
Hi there! Would you like to have fun and make a cute mommy bag? You can use it when walking with your baby. This bag would be great for diapers and other baby things. 

You can see the Tutorial with lots of pictures here: click 
It's in Russian but many pictures will help you.

Sep 24, 2014

'Pumpkin' Lunch Mat TUTORIAL ❤ Салфетка Ланчмат "Тыковка" МК

DIY, Tutorial, Lunch Mat Pattern, Pumpkin Lunch Mat, patchwork tutorial, quilted lunch mat, Салфетка Мастер-класс, салфетка пэчворк, ланчмат своими руками, осенний декор

Today I've prepared an interesting tutorial for you! We are going to make a quilted 'Pumpkin' lunch mat! The finished size is 49 x 34 cm.
Сегодня мы с вами будем учиться шить ланчмат-салфетку на стол в технике пэчворк. Я всё подробно и по пунктам расскажу и покажу, поэтому, думаю, что сделать такую салфетку сможет любой желающий, кто хоть немного умеет шить на машинке.
Размер салфетки 49 х 34 см.
Итак, приступим! :)

Sep 15, 2014

Fabric Book Cover Tutorial ❤ Мягкая обложка для книги МК


Some time ago I made a recipe book of a large notebook. I printed some recipes and glued them in the notebook. So, since then I had this idea to make a soft cover for that book. Finally, I made it and now I want to share it with you. I made a tutorial about how I made this book cover.
The book cover looks like this:
Давно хотела сшить мягкую обложку для книжки с рецептами, и вот наконец идея воплотилась. Теперь хочу поделиться с вами! Книжка с рецептами у меня тоже ручной работы из большого блокнота и распечаток с рецептами. Вот этот блокнот и нуждался в обложке.
Обложка получилась вот такая:


Sep 9, 2014

Pumpkin Pincushion Tutorial ❤ Шьём Тыкву Игольницу МК


Hi everyone!  Today I prepared a little tutorial for you! This is a pumpkin pincushion. It is a very easy project and a great fall home decoration! You can enlarge the pattern and make many of these in different sizes, and decorate your home! :)
You will need:
  • The Pattern (below)
  • Orange cotton
  • Small piece of green or brown cotton for the stem
  • Polyester stuffing
  • Big needle and thick thread
  • Piece of twine for decoration
- add 1/4" (6mm) seam allowance
- sew all pieces with right sides together

Aug 3, 2014

Primitive Cats TUTORIAL ❤ Коты Примитивы МК


Today I would like to share a primitive cats tutorial! I made these cats in early spring this year but I didn't post them here yet. They are very simple to make and very prim looking cats. :) See the patterns and sewing directions below. Happy sewing to you! :) 
❤ 
Сегодня хочу поделиться небольшим мастер-классом по шитью котов-примитивов. Я сделала их ещё ранней весной, но здесь ещё не публиковала. Они очень просты в изготовлении и отлично украсят интерьер! См. выкройки и инструкцию внизу. Приятного шитья! :)

Oct 5, 2013

How to Paint Eyes - TUTORIAL


Hi! I decided to write another post before I leave for vacation.
This is a small tutorial on how to paint doll's eyes. 
Hopefully you'll find this useful :)

I drew couple little pictures to explain steps. But first - a list of materials that you'll need:

  • Acrylic paint set (It's better to use textile acrylic paint for this.) You can find all the supplies in any craft store (like Hobby Lobby).
  • Several paint brushes (Use couple very thin ones and a bigger one.)
  • Glass of water
  • Rubber gloves
  • Marking pen/ pencil
  • Palette (for mixing colors) - any plate will work

Put your rubber gloves on :)

1) Draw the eye shape with pen/pencil


2)Paint the white part


3) Paint the iris 
4) Add black pupil


5) Paint lighter spots on the iris
6) Add upper and lower black eyelashes lines
7) Paint the upper eyelid
8) Add pale pink eye corners
9) Add dark shades under the upper eyelid 
(Add lots of water to dilute paint. That makes it half-transparent.)
10) Add dark shades above and under the eye 
(Again add lots of water to dilute paint and get half-transparent color.)
11) Paint couple white dots on the pupil to make light spots


Done!


Note: Don't be afraid to mix your colors. Use a plate as a palette for this. You can get lots of different new shades by mixing paints.

You can also add water to your colors to dilute them. That's how you get transparent colors for eye-shadows.


Sep 29, 2013

Halloween Crow FREE E-PATTERN ❤ Ворон МК


Hello everyone! :) Today I prepared a great free gift for you! Meet Jack the Halloween Crow! He is a primitive doll handmade by me. And today I would like to share my first PDF E-Pattern with you for free! 

I have put a lot of time and hard work into this pattern, so if you download it, please leave a comment. I really need to know what you think about it!

I've opened a Etsy shop for my new doll e-patterns, so I would love to get some feedback on this pattern.

The pattern has detailed instructions on sewing and painting and lots of pictures. DOWNLOAD IT HERE: CLICK

Please read the copyright policy at the page bottom. 

❤ 

Всем привет! :) Сегодня я приготовила для вас подарок! Это бесплатный мастер-класс по изготовлению вот такого ворона на тыкве, который станет отличным украшением к Хэллоуину!

Бесплатный мастер-класс на русском языке я опубликовала на Ярмарке Мастеров по этой ссылке: тык

Этот же мастер-класс на англ. языке можно скачать в формате PDF по этой ссылке: тык

Sep 28, 2013

How to Dye Fabric TUTORIAL ❤ Как красить ткань МК


Today I would like to show you how I dye fabric for my primitive dolls.
It is a very important thing to do when making primitives because they're supposed to look old and worn out.
You probably know that there are many different ways to dye fabrics. But I would like to share how I do it.
Сегодня я бы хотела рассказать о том, как я крашу ткань для моих кукол примитивов. Это довольно важная часть процесса изготовления куклы примитива (или чердачной куклы), так как кукла должна выглядеть состаренной и изношенной.
Вы наверное знаете, что существует много способов окрасить ткань. Сегодня я хочу поделиться тем, как это делаю я.

Sep 20, 2013

Primitive Candle Holders Tutorial ❤ Подсвечники МК


Today I would like to show you how to make these primitive candle holders.

Сегодня я бы хотела рассказать о том, как сделать вот такие подсвечники из консервных баночек.

You will need:
1) 1 can
2) 1 big nail
3) hammer
4) marker (not permanent)
5) pliers
6) file
7) wire
8) water
9) freezer

Вам понадобится:
1) 1 банка консервная
2) 1 большой гвоздь
3) молоток
4) не перманентный маркер
5) пассатижи
6) напильник
7) проволока
8) вода
9) морозилка


Clean the can. / Вымойте банку


To get rid of glue spots heat the can and wipe off melted glue. / Удалите все остатки этикетки.


Pour some water into the can (about 2-3 cm). Put it in the freezer.
Wait and then take it out when frozen. It should look like this: 

Налейте 2-3 см воды в банку. Поставьте в морозилку. Когда замёрзнет, должно выглядеть так:


Pour more water and freeze it again.
Do it untill the can is full of ice.

Повторите процесс. Делайте так, пока банка не наполнится льдом.


This is what you should get: / Получится так:


Draw some design with a marker. / Теперь рисуем любой дизайн.


Then quickly make holes with nail and hammer. Do it before the ice starts to melt.

Рисуем быстро, чтоб лёд не растаял. Берём молоток и гвоздик и делаем дырочки по линии.


This is what you should get: / Получится вот так:


If you want your candle holder to have a handle, then don't forget to make 2 additional holes for the wire handle close to the top of your can.

Melt the ice with hot water.
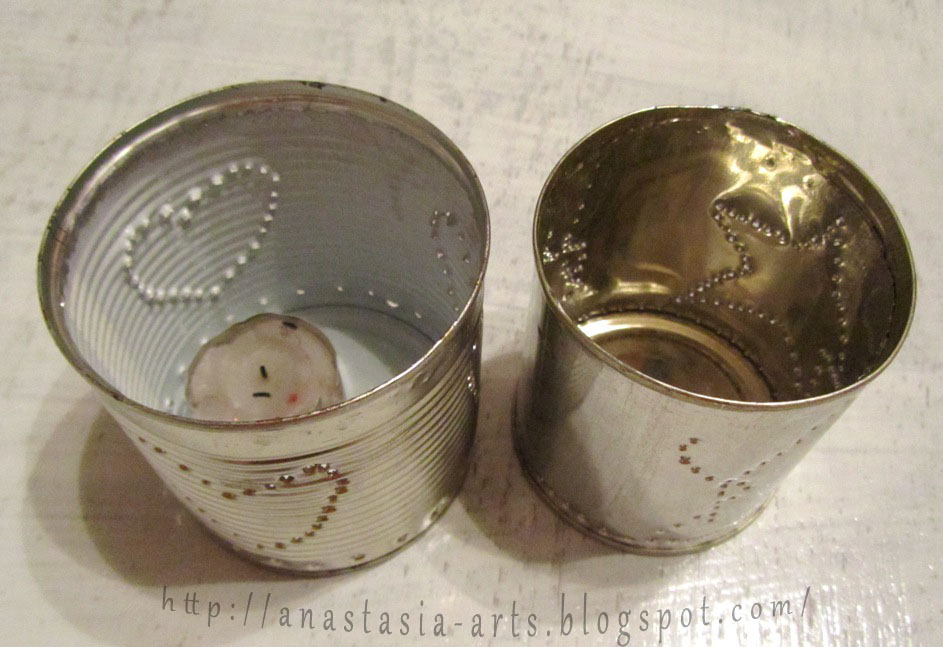
I made 2 cans:

Если вы хотите светильник с ручкой, то не забудьте 2 дополнительные дырки у верха для проволоки.

Далее, растапливаем лёд горячей водой. Я сделала 2 баночки:


Now we need to file all sharp edges.
You can do it with the file or you can just bend them with pliers. 
I chose to use pliers.

Теперь напильником сглаживаем острые углы у верха. Можно также загнуть их пассатижами.


It's done!
 You can leave it like this or you can add a handle.

Всё готово! Теперь приделаем ручку.


Attach the wire to the can.

Вставляем проволочку в дырки и загибаем.


Done: / Готово:


Now put a candle inside and light it!

Теперь можно вставить внутрь свечу и зажечь светильник!


The can will get hot so be careful with it.

Баночка может сильно нагреться, поэтому осторожнее!


Here is a candle holder without wire handle:

А вот светильник без ручки:


These candle holders can make a great Christmas country-style decoration.
I hope you liked this tutorial :)

Такие светильники станут отличным украшением к Новому Году и Рождеству!
Спасибо за внимание! :)